Hello Everyone,
This post will help You understand the Hyper-V installation process & console overview...
As already explained in my previous post, Hyper-V is a in-built role of Windows Server Operating System which needs to be installed from server manager.
Let's see how to install this role in Windows Server 2012 R2... (Process is same in all versions i.e. it is installed from Server Manager).
To see Hyper-V Features, Click Here!
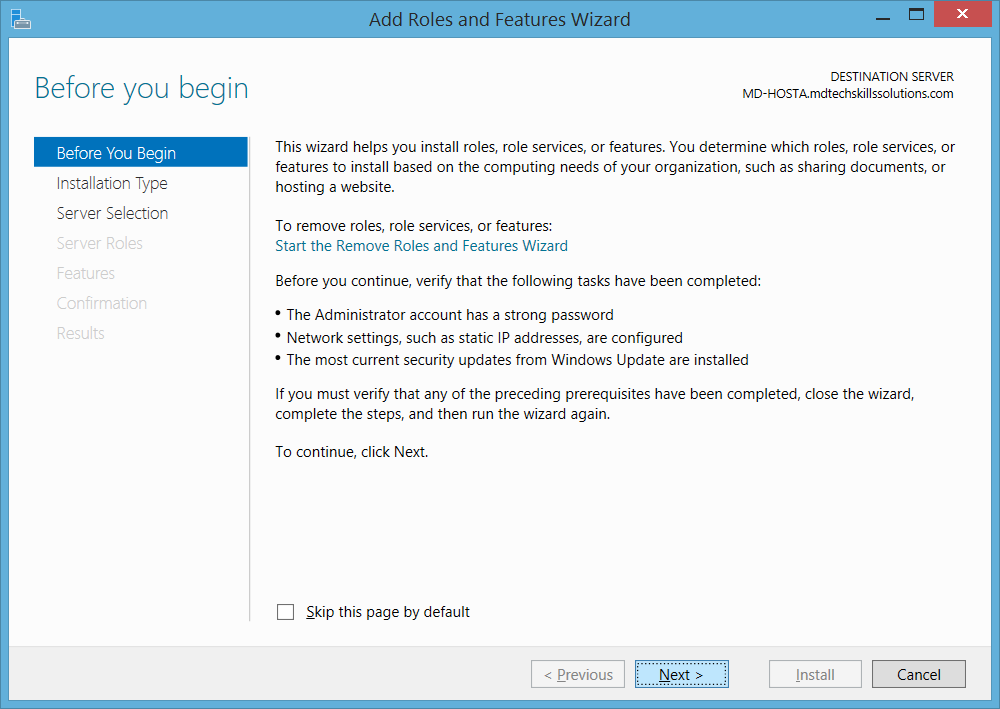
Open Server Manager & Click on "Add Roles & Features" in Dashboard. A new window will open:

Click Next:

Click Next:

This will display the Server Name & IP Details on which You are going to install roles & features, Click Next:

Select Hyper-V Role & Click Next, Next & Install:

I have already installed so it is showing as Installed...
Press Window Key on Keypad, Type Hyper-V on Search option, You will see Hyper-V Manager, Click on It:

Hyper-V Console will open:

This is the only installation process for Hyper-V from Server Manager.
Now, before proceeding to further showcase for features, I will show the concept for network configuration on host level & Hyper-V Switch level in details in next post.
Happy Reading!!!
This post will help You understand the Hyper-V installation process & console overview...
As already explained in my previous post, Hyper-V is a in-built role of Windows Server Operating System which needs to be installed from server manager.
Let's see how to install this role in Windows Server 2012 R2... (Process is same in all versions i.e. it is installed from Server Manager).
To see Hyper-V Features, Click Here!
HYPER-V ROLE INSTALLATION PROCESS:
Open Server Manager & Click on "Add Roles & Features" in Dashboard. A new window will open:

Click Next:
Click Next:

This will display the Server Name & IP Details on which You are going to install roles & features, Click Next:

Select Hyper-V Role & Click Next, Next & Install:

I have already installed so it is showing as Installed...
How to open Hyper-V Console:
Press Window Key on Keypad, Type Hyper-V on Search option, You will see Hyper-V Manager, Click on It:

Hyper-V Console will open:

This is the only installation process for Hyper-V from Server Manager.
Now, before proceeding to further showcase for features, I will show the concept for network configuration on host level & Hyper-V Switch level in details in next post.
Happy Reading!!!
If You like my post then follow my updates:
Join my Facebook group for updates on trending technologies/technical references/issues etc:

F2D6C558B4
ReplyDeletekiralık hacker
hacker arıyorum
belek
kadriye
serik